

Many times, you would’ve come across a scenario where you would want to update information or perform a specific set of activities when you receive a certain type of ticket. It can be anything from adding a specific note for the others in the team, setting a specific priority or urgency, set an approval stage, or even add an agent or an admin as a watcher, etc.
Scenarios like this happen several times during the day and performing them manually can be a little monotonous. If you’re thinking about workflow automator, I wouldn’t say it is wrong.
All the aforementioned scenarios can be tackled through workflows. But, workflows get executed for all events whenever the conditions match. Also, I would personally prefer saving workflows for more complex tasks like ticket sorting, setting up an internal approval process, etc.
If you ask me what am I getting at, my answer is “Scenario Automations”
Scenario automation is a feature that allows you to perform a simple action or a bunch of actions within a ticket at a click of a button.
Instead of automating the process in the backend, like workflow automator, scenario automation allows you to weigh in the situation and use them whenever necessary.
Creating a Scenario Automation
If you’re wondering how you can create a scenario automation, it is very simple.
Head to Settings > Scenario Automations (under Helpdesk Productivity)
Click on New Rule
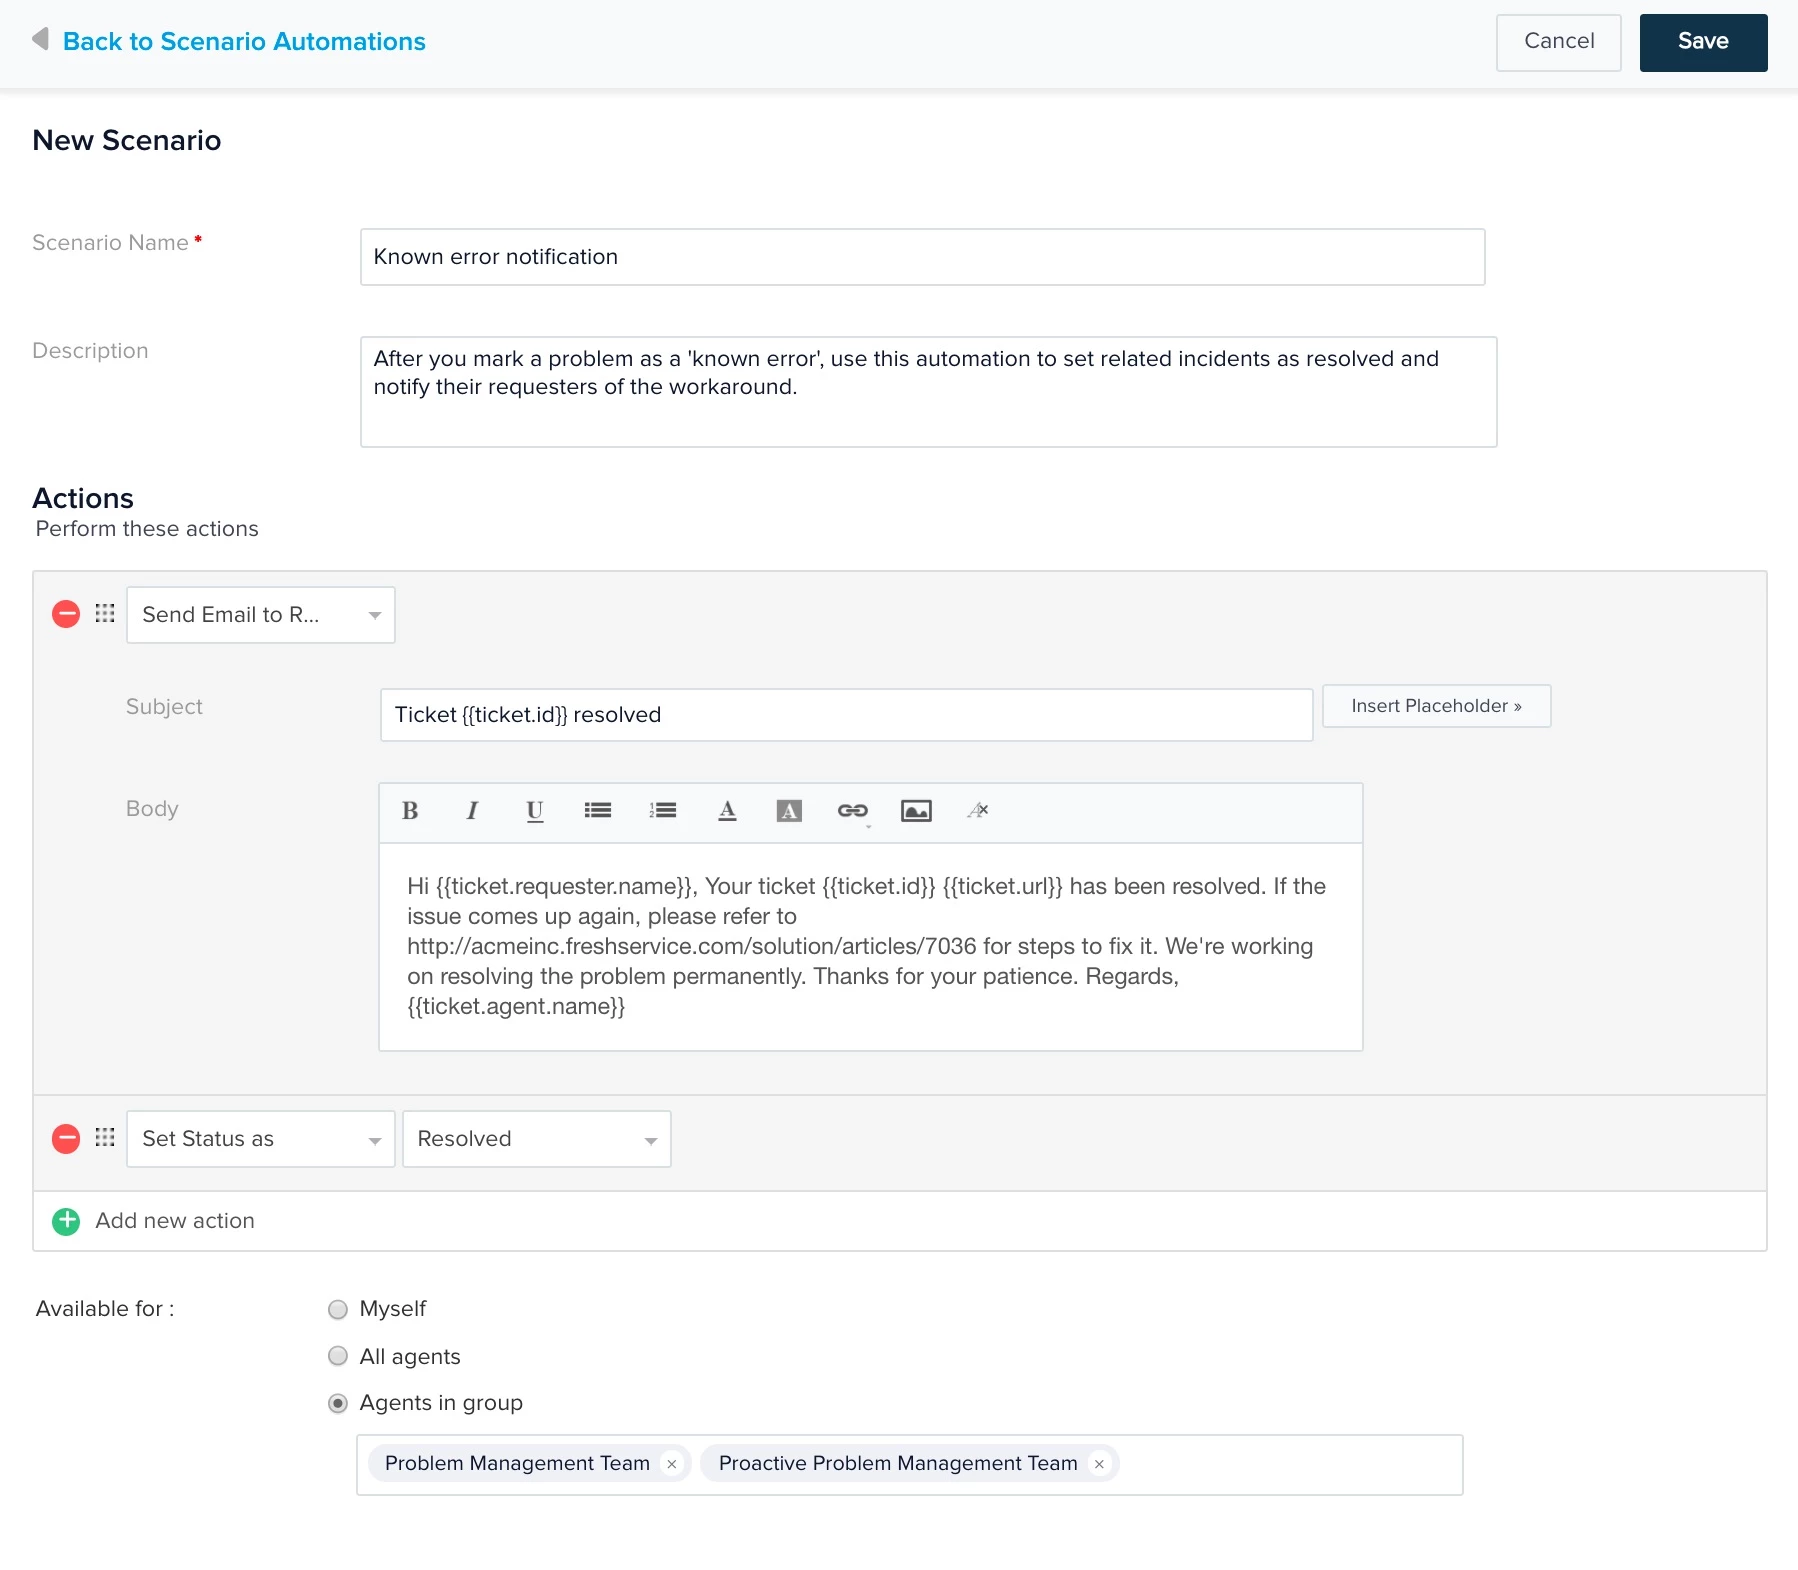
Provide a name for your scenario automation and add a description. Make it more elaborate if you’re planning to share this with the others in the team.
Choose the action you wish to perform.
Click on Add New Action if you wish to add more actions.
After adding the actions, choose the sharing permission. You can share the scenario automation with yourself, with your team, or with all the agents in your organization.
Executing a Scenario Automation
To execute a scenario automation,
Click on the ticket for which you wish to execute the scenario automation.
Click on the More drop-down and select Scenarios
Hover the mouse pointer over the scenario you wish to execute and click on Execute.
Use cases for Scenario Automation
Adding a watcher
If you want to add a fellow agent or your supervisor as a watcher to a specific set of tickets, you can do it using scenario automation. All you got to do is choose the action Add Watcher and choose the name of the team member you wish to add.
Setting Priority and Urgency
There may be times where you wish to add a certain priority and urgency to a specific type of tickets. You can do it by adding two actions under Scenario Automation: one for priority and another one for urgency.
Adding Tasks
If you wish to add a set of specific tasks when you come across a ticket, you can do so by adding the parameter Add Task while creating a scenario automation. The tasks you had written down will be added to the ticket when you execute the scenario automation.
If you think “Is this all I could do with Scenario Automation?”. No! There’s more to scenario automation. Try creating a scenario automation and explore all the available options that could make your life easy.
And once you had tried it, let us know what did you create and how did scenario automation simplify your life.
See you soon with another exciting spotlight post.
Until then, stay awesome!