
")

If your service desk is juggling HR requests, IT tickets, and Finance approvals all in one cluttered space, it’s time to declutter and efficiently manage your workflow.
One of the most powerful features in Freshservice is the ability to create Workspaces, that are dedicated, secure environments tailored for every team in your organization.
Why workspaces are a game-changer
Think of a workspace as a private command center for your team. You get to keep the unified platform you want, while giving each department its own.
- Custom workflows: HR needs a different process than IT. Now, they can have it.
- Tailored form fields: Capture only the data that matters to your specific team.
- Ironclad security: Keep sensitive data (such as payroll or legal tickets) visible only to those who need it.
Ready to build?
If you have admin privileges, you’re just a few clicks away from a more organized workday. Here’s how to get started:
- Find the hub: Go to Admin > Workspace Settings in your Freshservice account.
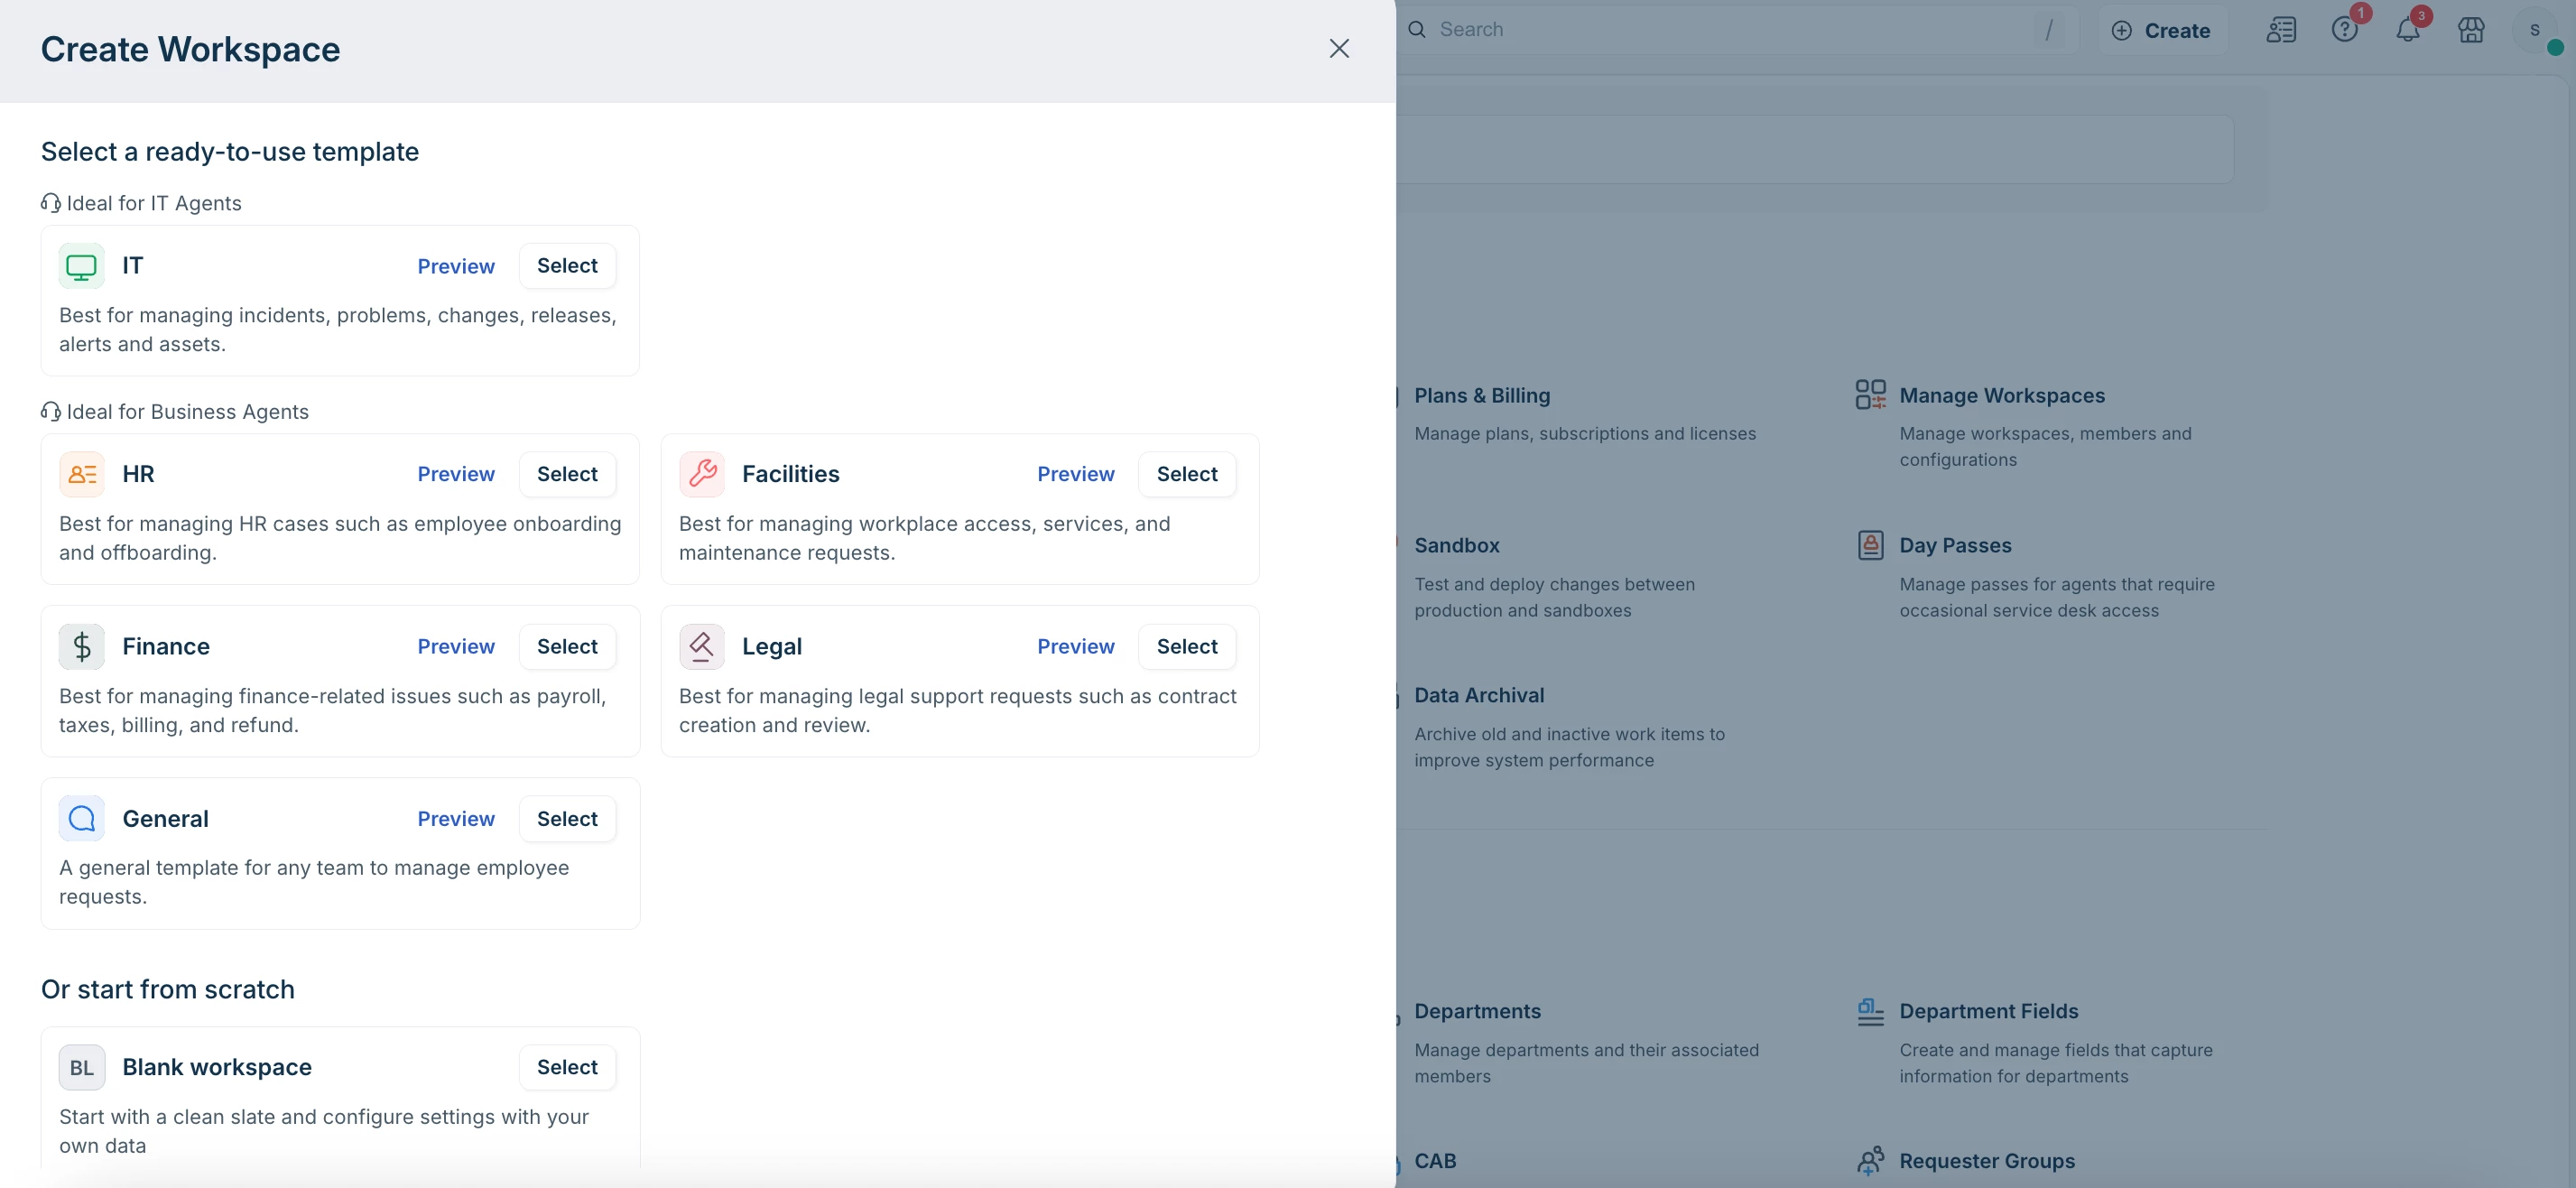
- Pick your blueprint: Select Create Workspace and browse our ready-to-use templates (such as Finance, HR, Facilities). Use the Preview option to see which one fits best.
- Name and claim: Give your workspace a name and assign your Workspace Managers.
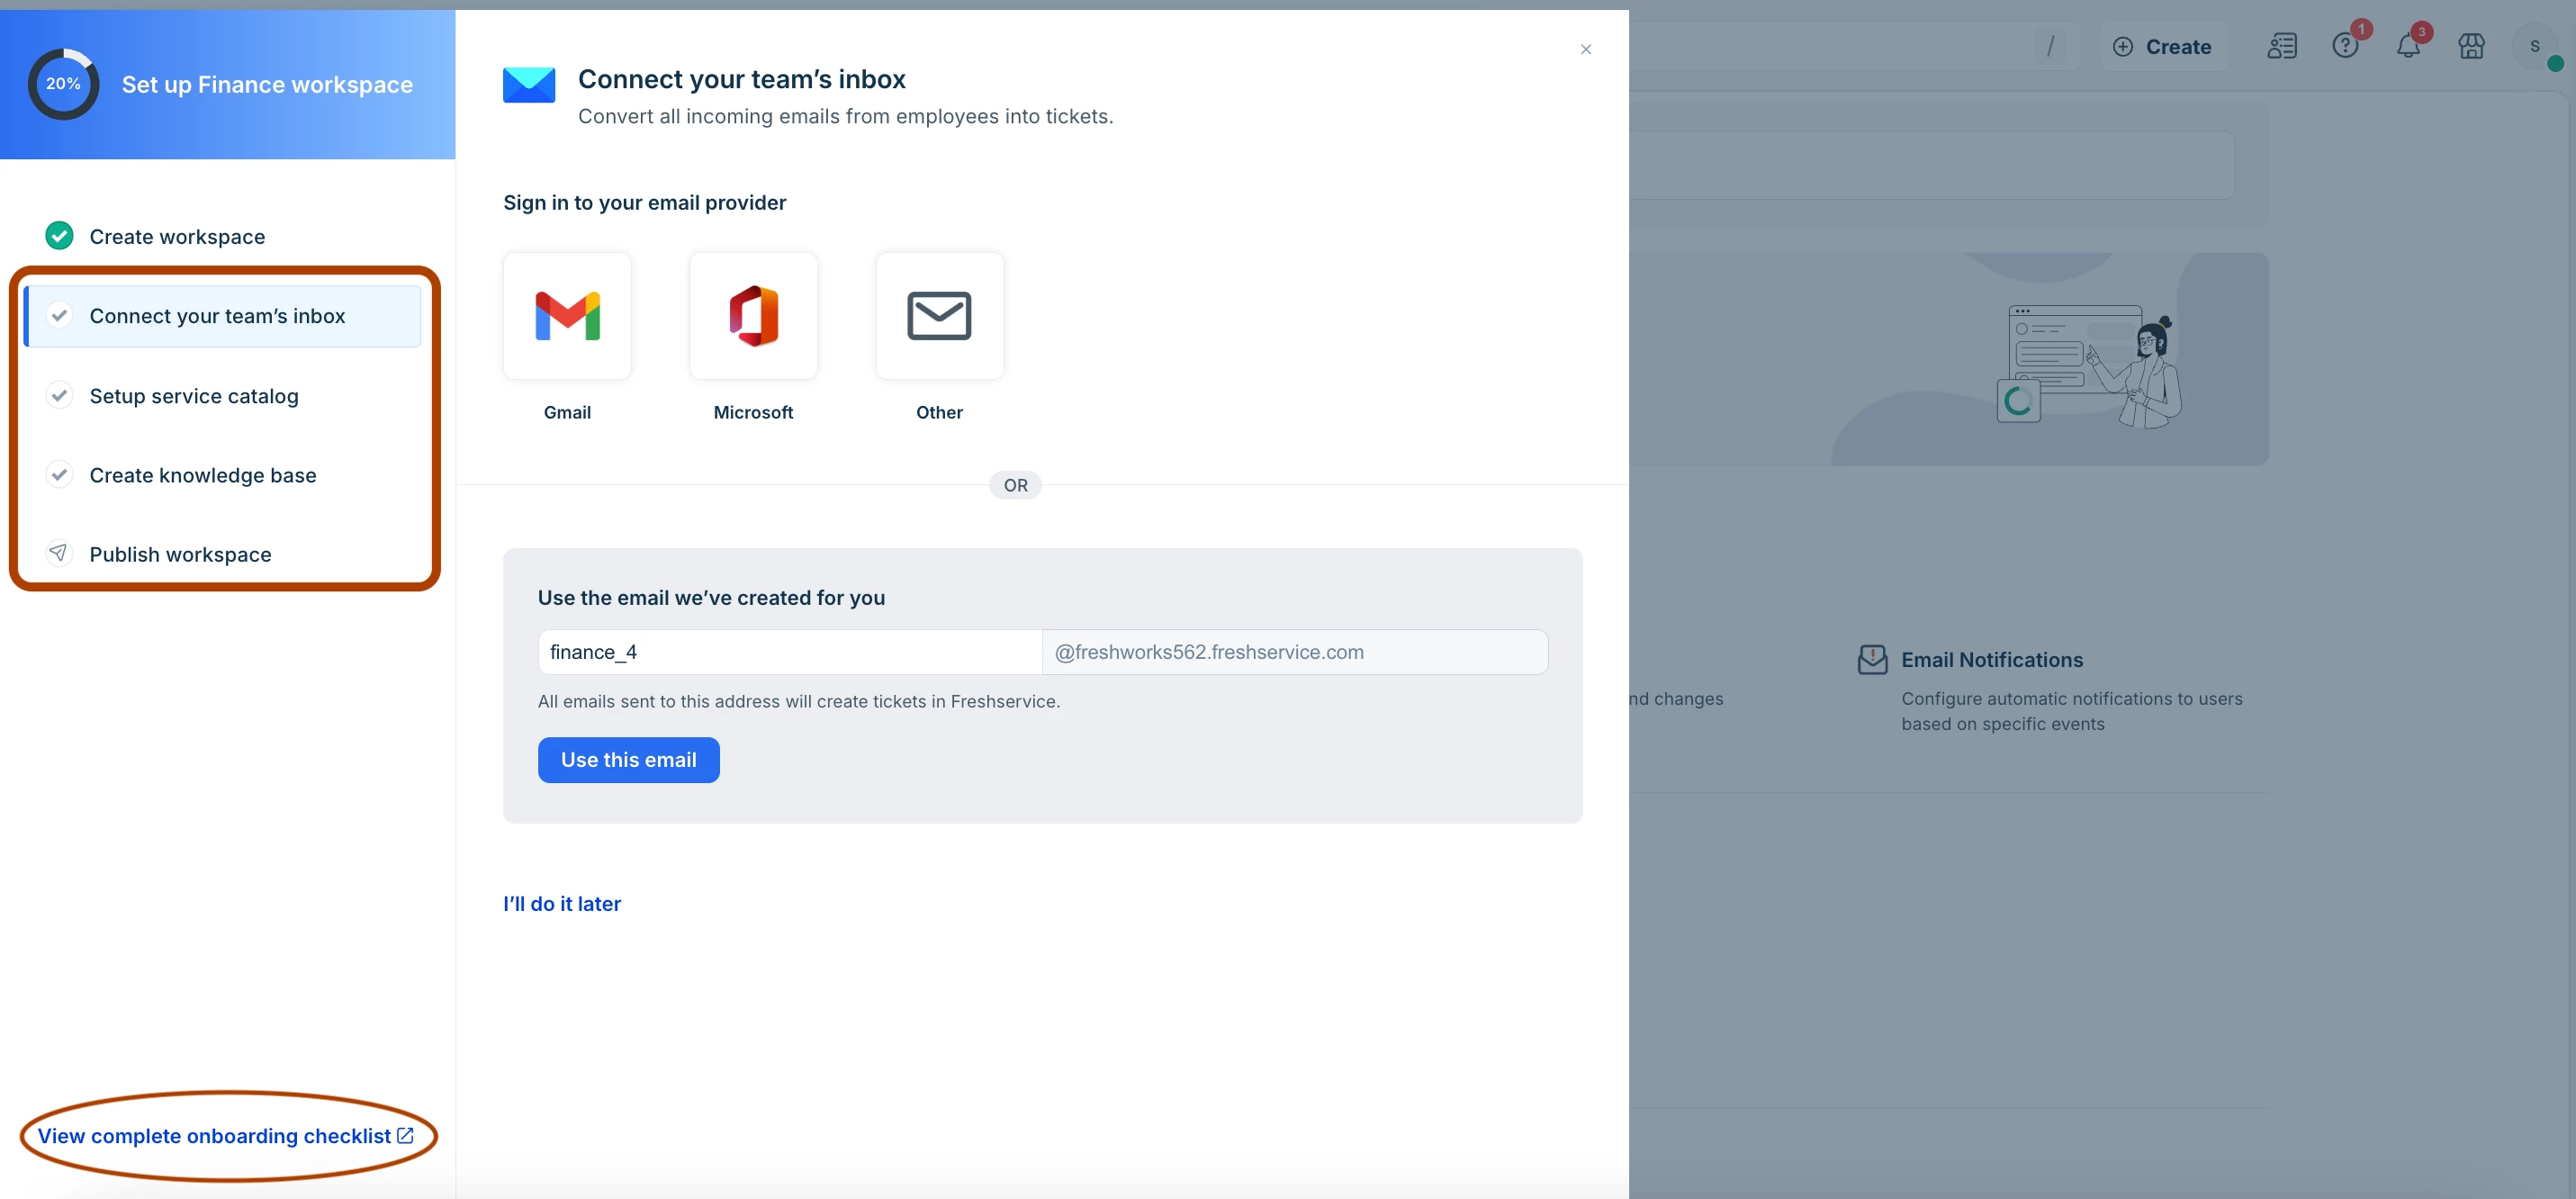
Pro tip: Keep the "Create sample data" toggle ON–the best way to explore how the workspace functions without having to build everything from scratch. - The "Let's go" moment: Once created, enter the Setup Mode, and connect your team’s Inbox, build your Service Catalog, and populate your Knowledge Base.
- Go live: Follow the onboarding checklist, and Publish.
What’s next?
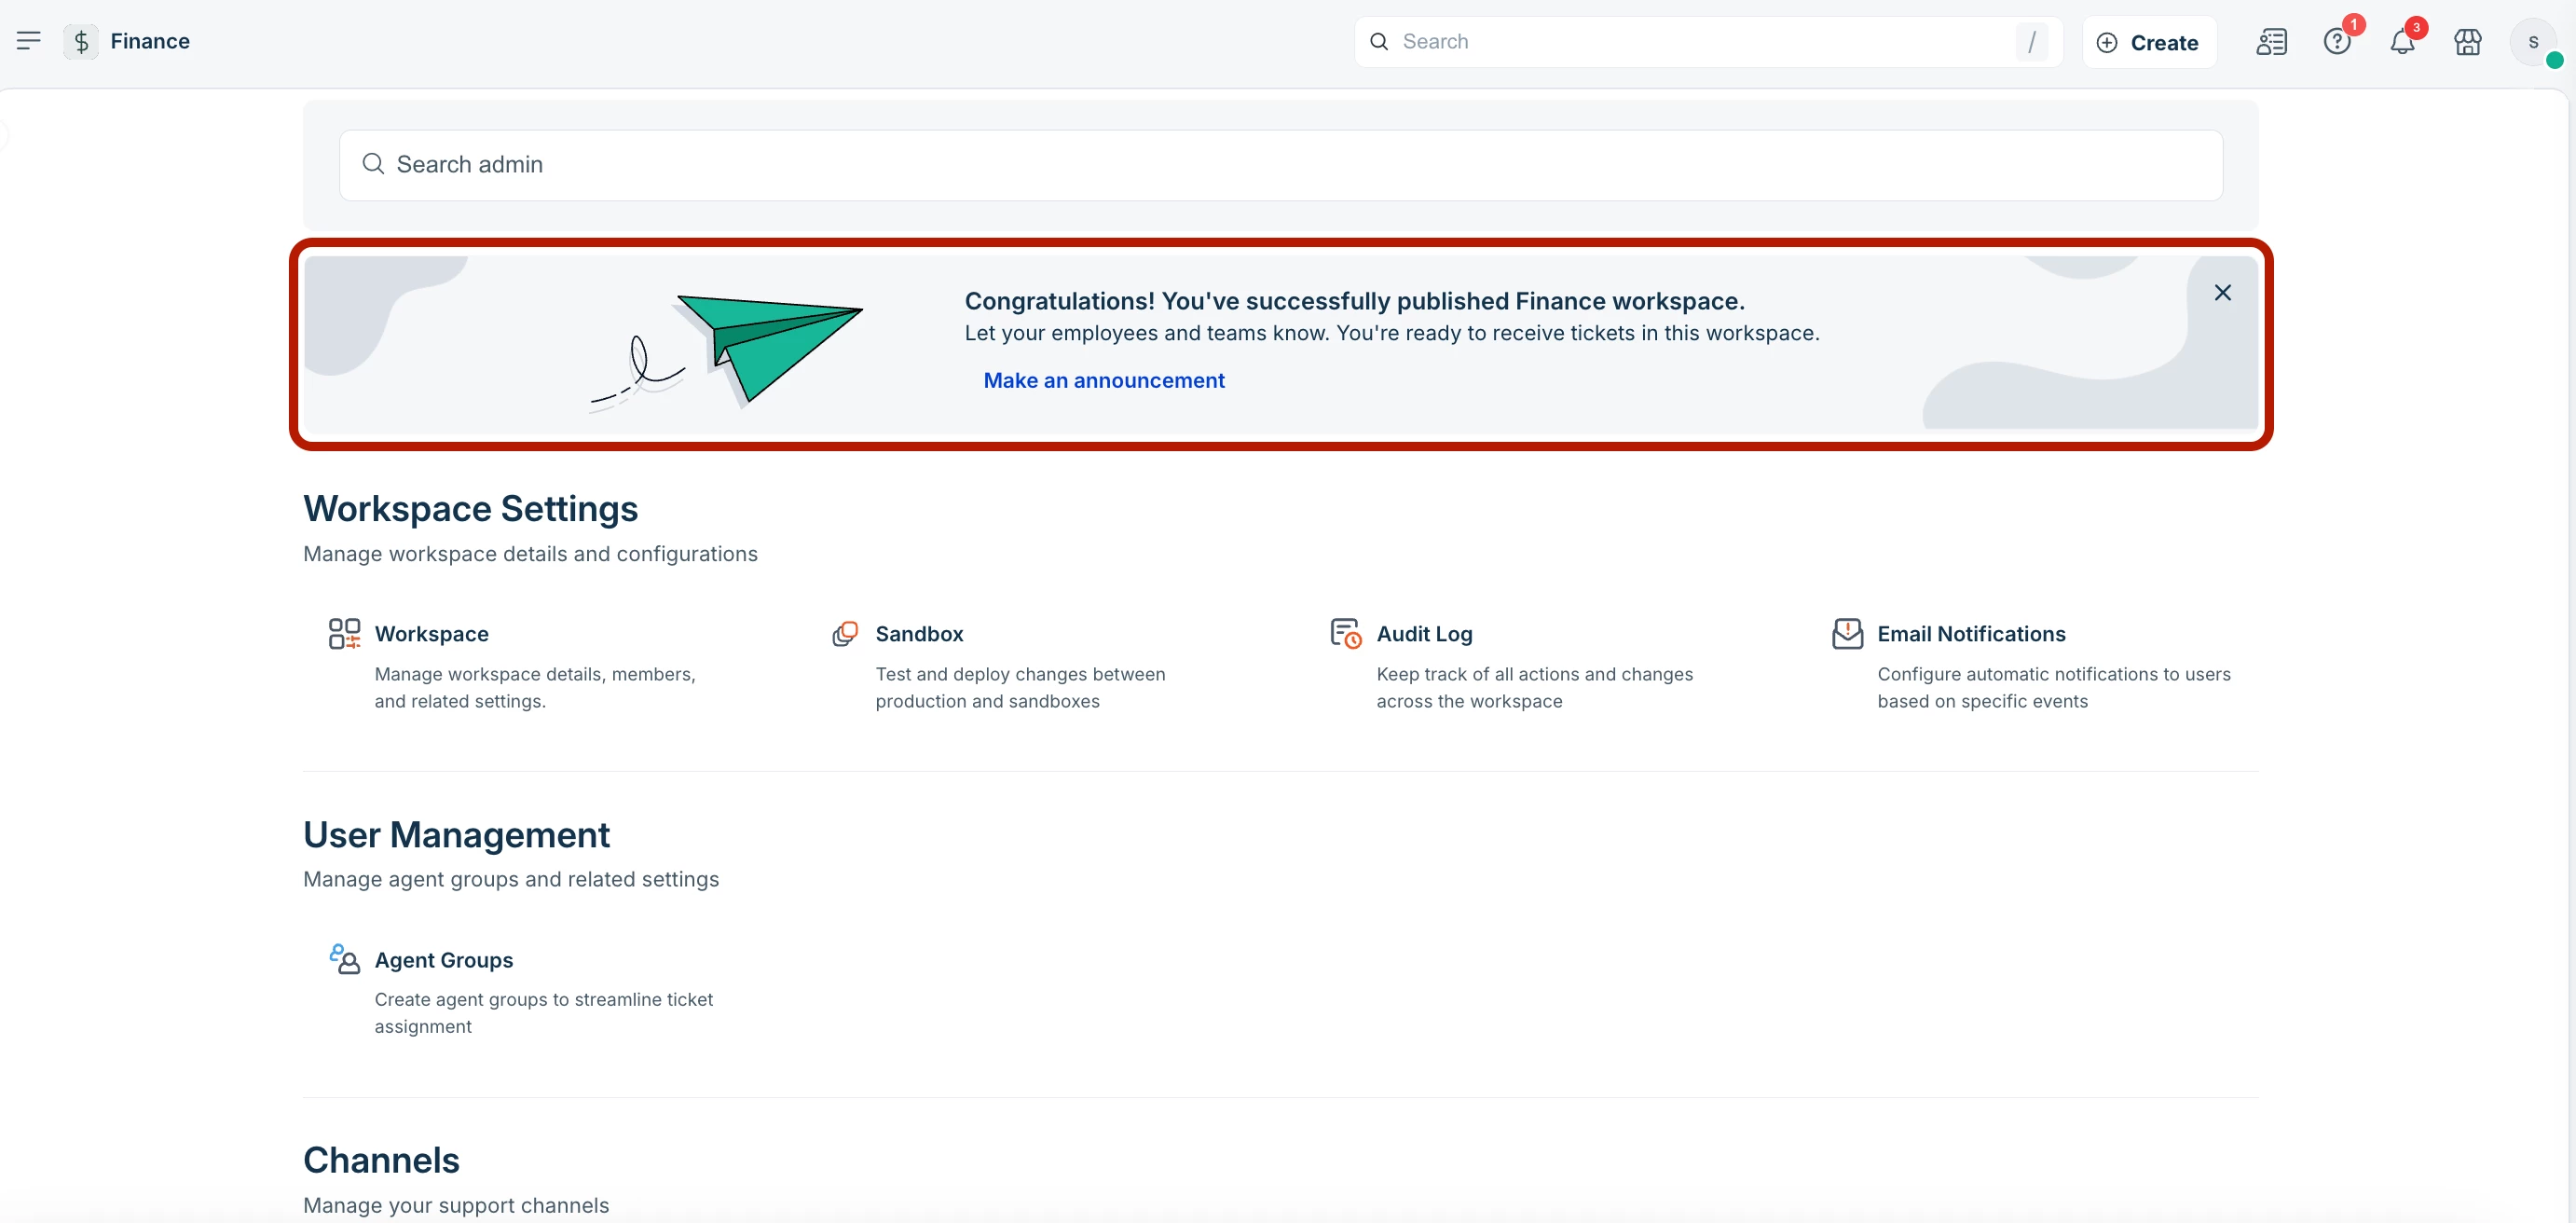
Once your workspace is live, you can make an official announcement to your team right from the dashboard.
Get started here:
Manage workspaces in Freshservice