Question

How to add custom elements in Freshworks?

  • 2 February 2023
  • 4 replies
  • 146 views

Hi guys!
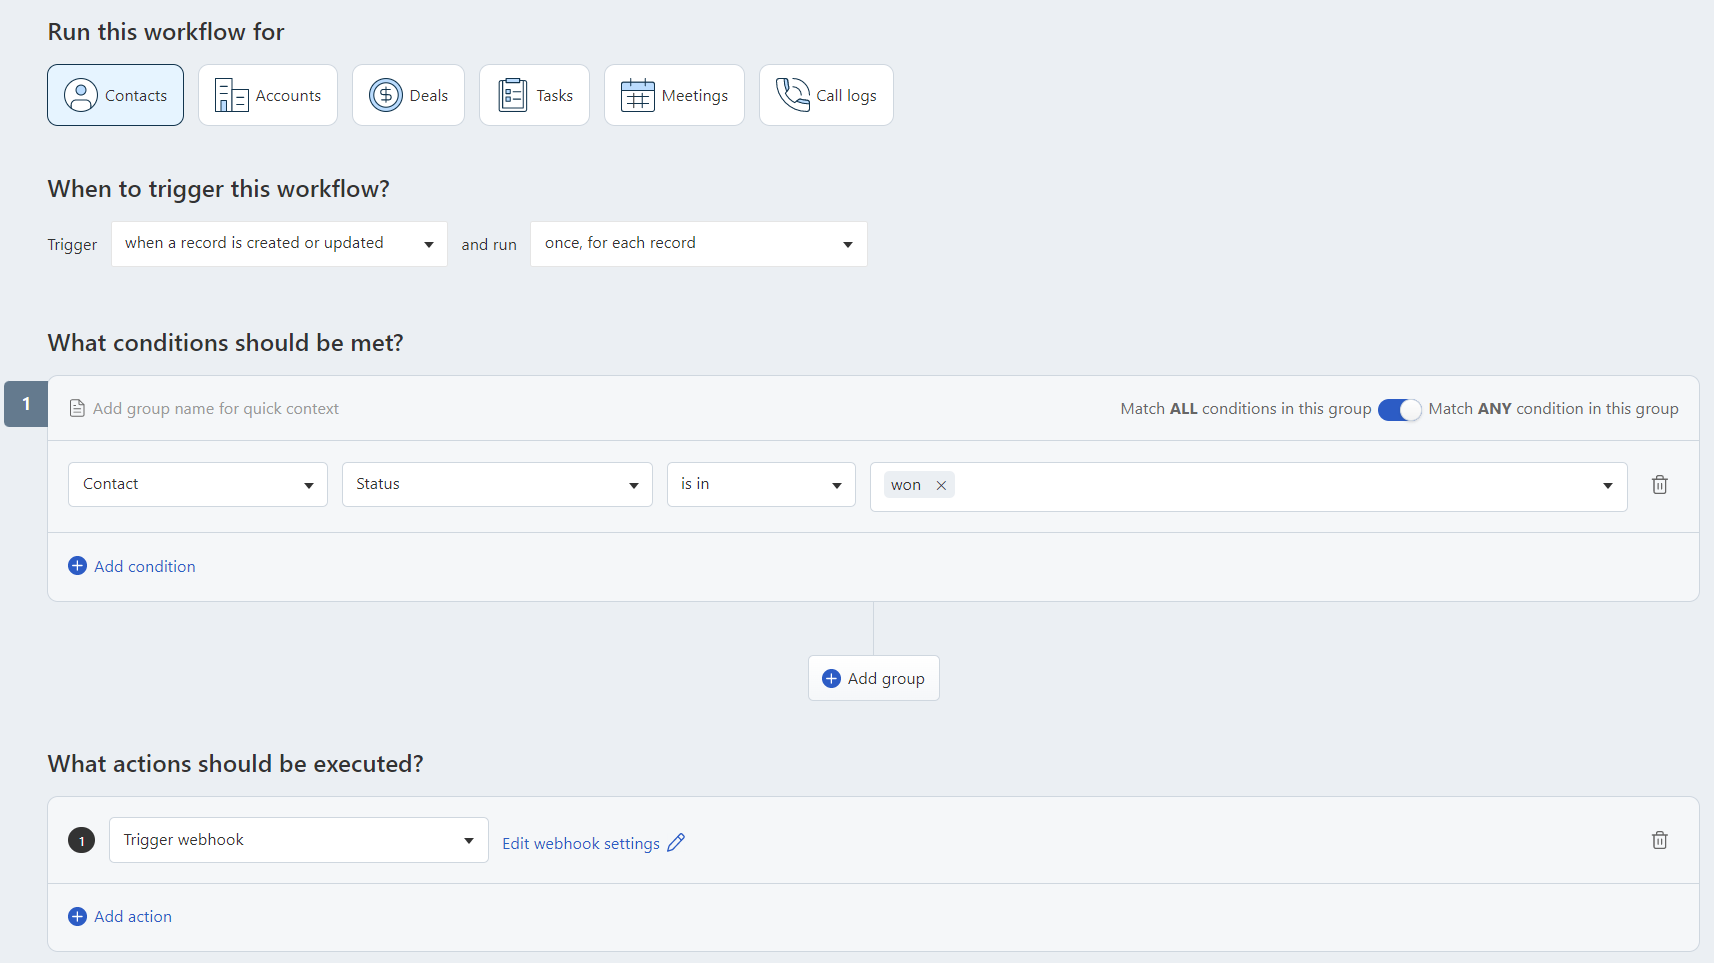
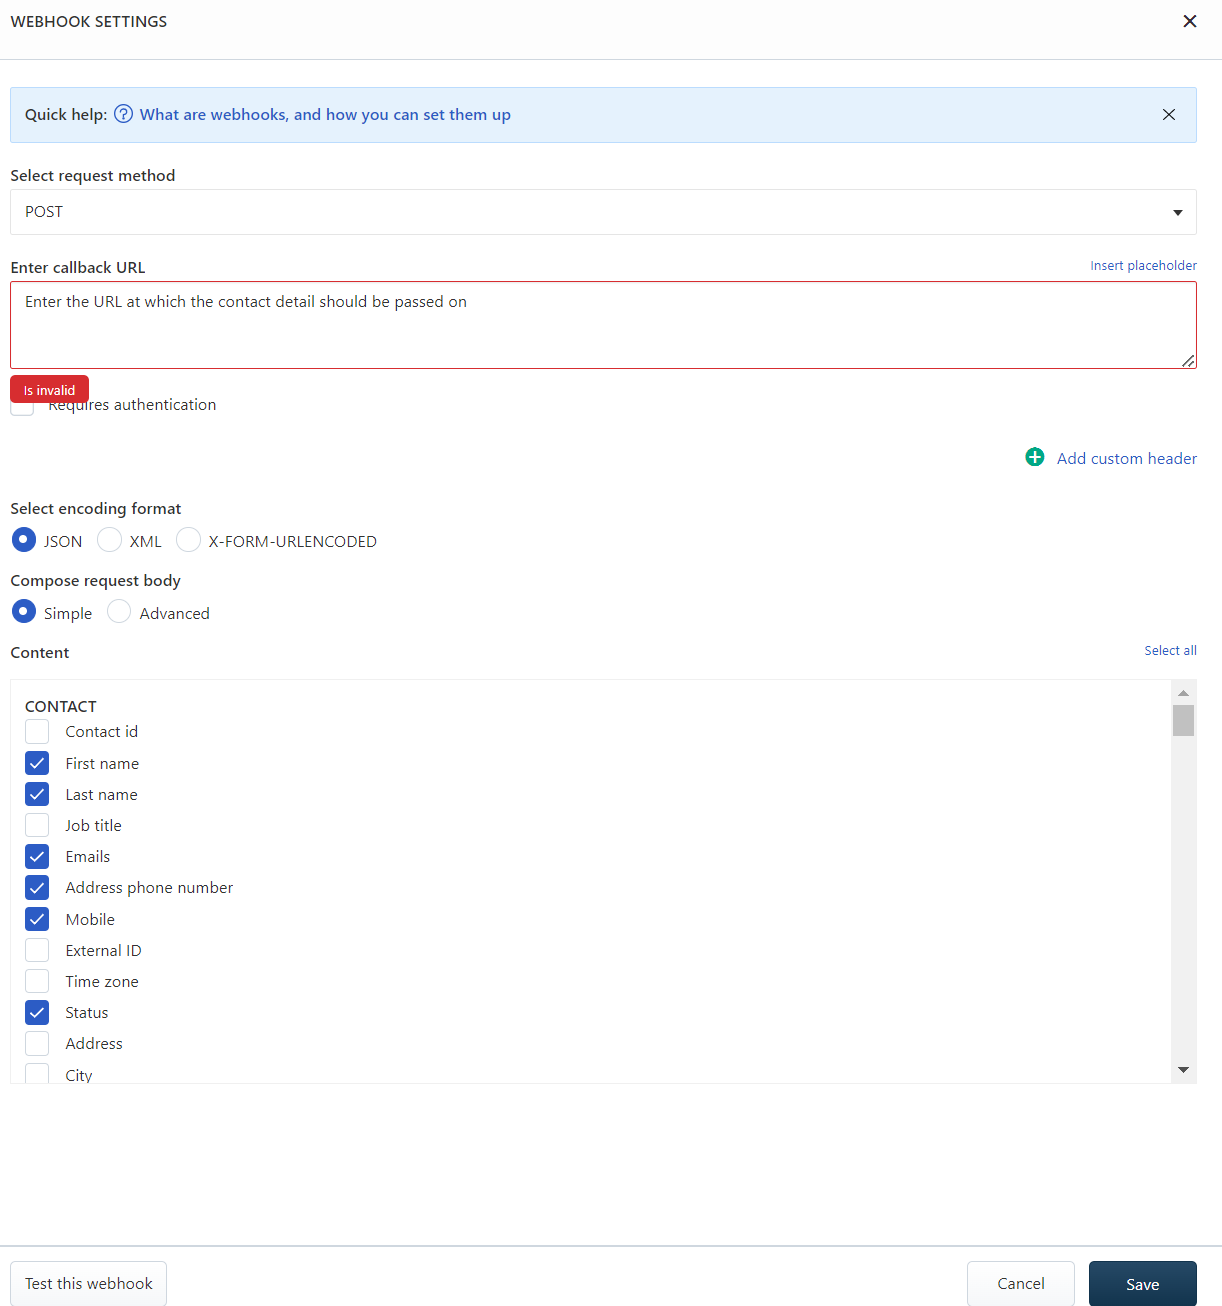
I’d like to add in my freshsales dashboard a button in a contact section. When I press the button, I want to send the contact details to webhook to 3rd party service. What’s the best way to achieve that?


4 replies

Userlevel 4
Badge +8

Hello! 

Greetings from the Freshworks Community! 

Currently, there’s no one click solution to achieve this, however, you can configure a workflow automation which will trigger a webhook based on a field condition getting satisfied. For example, if you’d like to send the contact details to a 3rd party platform whenever the “Status of the contact is in Won” 


Webhook setup screenshot: 


Therefore, whenever the “Status” is marked as “Won”, this webhook will be automatically triggered and the contact information that you select will be sent out. 

I hope this helps. Kindly check the same and let me know in case of any further queries. 

Badge +1

You can also explore using Freshworks Developer SDKs to create custom pages with HTML and Javascript that can have actual custom button(s) under contacts you can learn more here 
https://developers.freshworks.com/crm/docs/quick-start/
developers.freshworks.com

To add custom elements in Freshworks, follow these steps:

  1. Log in to your Freshworks account and click on "Admin" in the top right corner of the screen.

  2. Select "Custom Elements" in the "Settings" section of the left-hand menu.

  3. Click on "Add Custom Element" and choose the type of element you want to create. You can choose from "Text Field," "Dropdown," "Checkbox," "Radio Button," and other types of elements.

  4. Fill in the details of the custom element, such as the name, description, and available options (if it's a dropdown, checkbox, radio button, etc.).

  5. Click "Save" and the new custom element will be added to your Freshworks account.

Keep in mind that custom elements are only available for certain Freshworks plans, so be sure to check your subscription options before starting to add custom elements. read more


Badge

To add a button in the contact section of your Freshsales dashboard and send the contact details to a webhook for a 3rd party service, you can follow these general steps:

  1. Create a Custom Button in Freshsales: First, you'll need to create a custom button in Freshsales that will trigger the action when clicked. This button will be placed in the contact section.

  2. Configure the Custom Button Action: Once the custom button is created, you'll need to configure its action to send the contact details to a webhook URL. You can set up the HTTP request (POST or GET) to send the data to the 3rd party service.

  3. Obtain Webhook URL from the 3rd Party Service: Get the webhook URL from the 3rd party service where you want to send the contact details. The URL typically is provided by the service and is where you will send the HTTP request containing the data.

  4. Define the Data to be Sent: Determine the data you want to send to the 3rd party service. This will depend on the requirements of the service. Usually, you will want to include information such as the contact's name, email, phone number, etc.

  5. Set Up the Webhook: Implement the necessary code or configuration in your backend or application to receive and process the data sent from Freshsales. The specifics of this step will depend on the technology stack and programming language you're using on your server-side.

  6. Test the Integration: Before deploying the integration, thoroughly test the webhook to ensure that the data is being sent correctly to the 3rd party service and that the service is responding as expected.

Please note that the exact steps to achieve this integration may vary depending on the version and customization options available in Freshsales, as well as the specific requirements and APIs of the 3rd party service you're integrating with. You might need to consult Freshsales documentation or reach out to their support team for assistance specific to your implementation.

Reply