With so many incidents and service requests coming in on a day to day basis, there is a higher probability of you missing out on important tasks. But, we already have a well-known solution to handle this problem - Calendar and To Do Lists.
Freshservice has Both a calendar and a to-do list helps you stay on top of your day to day tasks and complete them on time.
This post will talk about how effectively you can use Tasks to be more productive every day.
Calendar
The calendar icon in the top right corner of your dashboard gives you a complete view of all the Changes and Tasks scheduled for the day. A change is added to the calendar based on the planned start and end date you choose while creating a change.

You can switch between tasks and changes and also get a quick look of tasks assigned to you the whole day, week, or month.

And, not just that! You can also view tasks assigned to other agents or other members in your group.
Tasks and changes cannot be added directly to the calendar. They can only be viewed.
Note: If an agent has access to just one of the ITIL modules (other than Tickets), they can view tasks for only that module (and for Tickets) - even for other agents.
That means, if an agent is a Change Manager and does not have access to Problem Management or Release Management, they can access tasks for only Tickets and Changes in the calendar.
Tasks
You can create tasks from Ticket, Problem, Change, and Release modules.
Let’s take an example where you wish to create a bunch of tasks for a new change. In order to that,
- Head to the change and click on Tasks
- Click on the Add New button
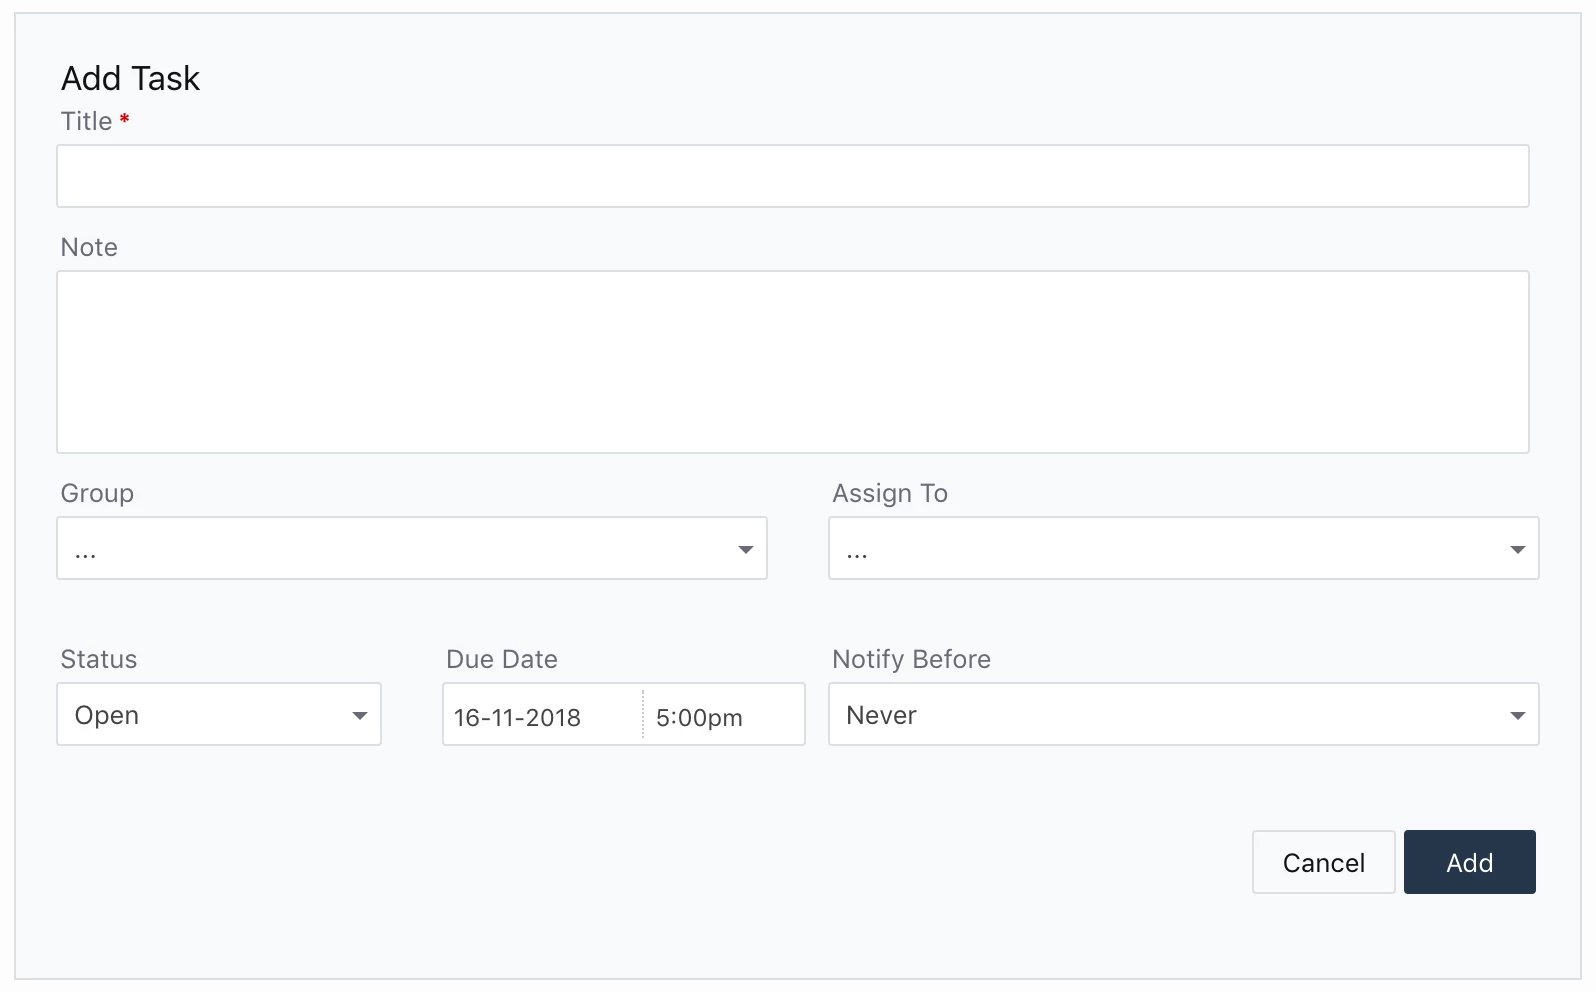
- Add a title to a task, and type in a note if you wish to add a description for that task.
- You can assign the task to yourself, your group, or to another agent in your team. You can use the appropriate drop-down menus to perform the action.

Now, the newly added tasks will be visible on the My Tasks section present on the right side of your Freshservice dashboard. In case of you assigning the task to another agent, they would see the task on their dashboard.
They can clear off the task by clicking on the checkbox present right next to each task. You can also view all the tasks by clicking the View All option present right on top of the My Tasks section.
In the View All section, you can view your tasks based on the following filters: Due Today, Overdue, Upcoming, and Completed.

Adding Tasks to agents using Workflow Automator
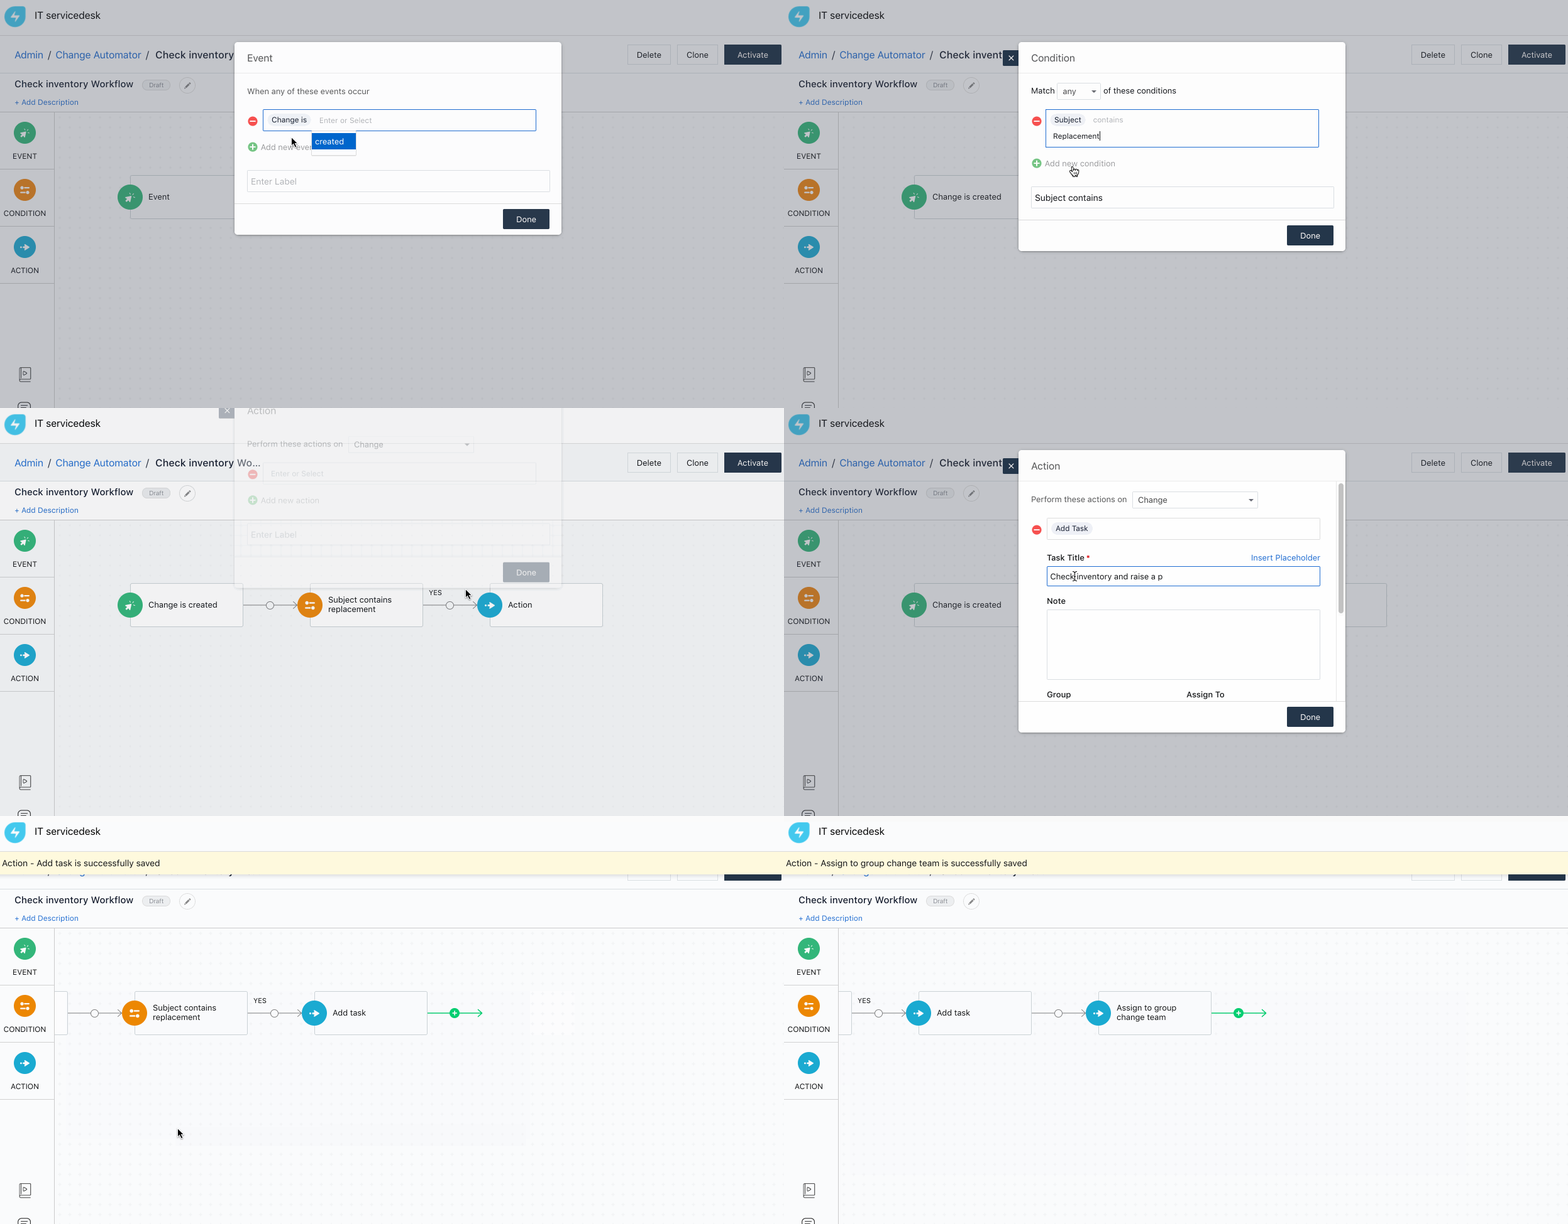
If you wish to add specific tasks to certain agents when you receive a particular set of tickets, you can do so using the workflow automator.
Let’s take an example where you to add a task “Check the inventory and raise a purchase order” to Andrea whenever a change related to hardware replacement is created.
Take a look at the GIF image to see how you can accomplish this using the workflow automator.


